Our Blog
Boost your vehicle's performance with expert battery servicing at TMJ Bimmers Euro Auto Repair in Houston, TX. Schedule an online appointment now!

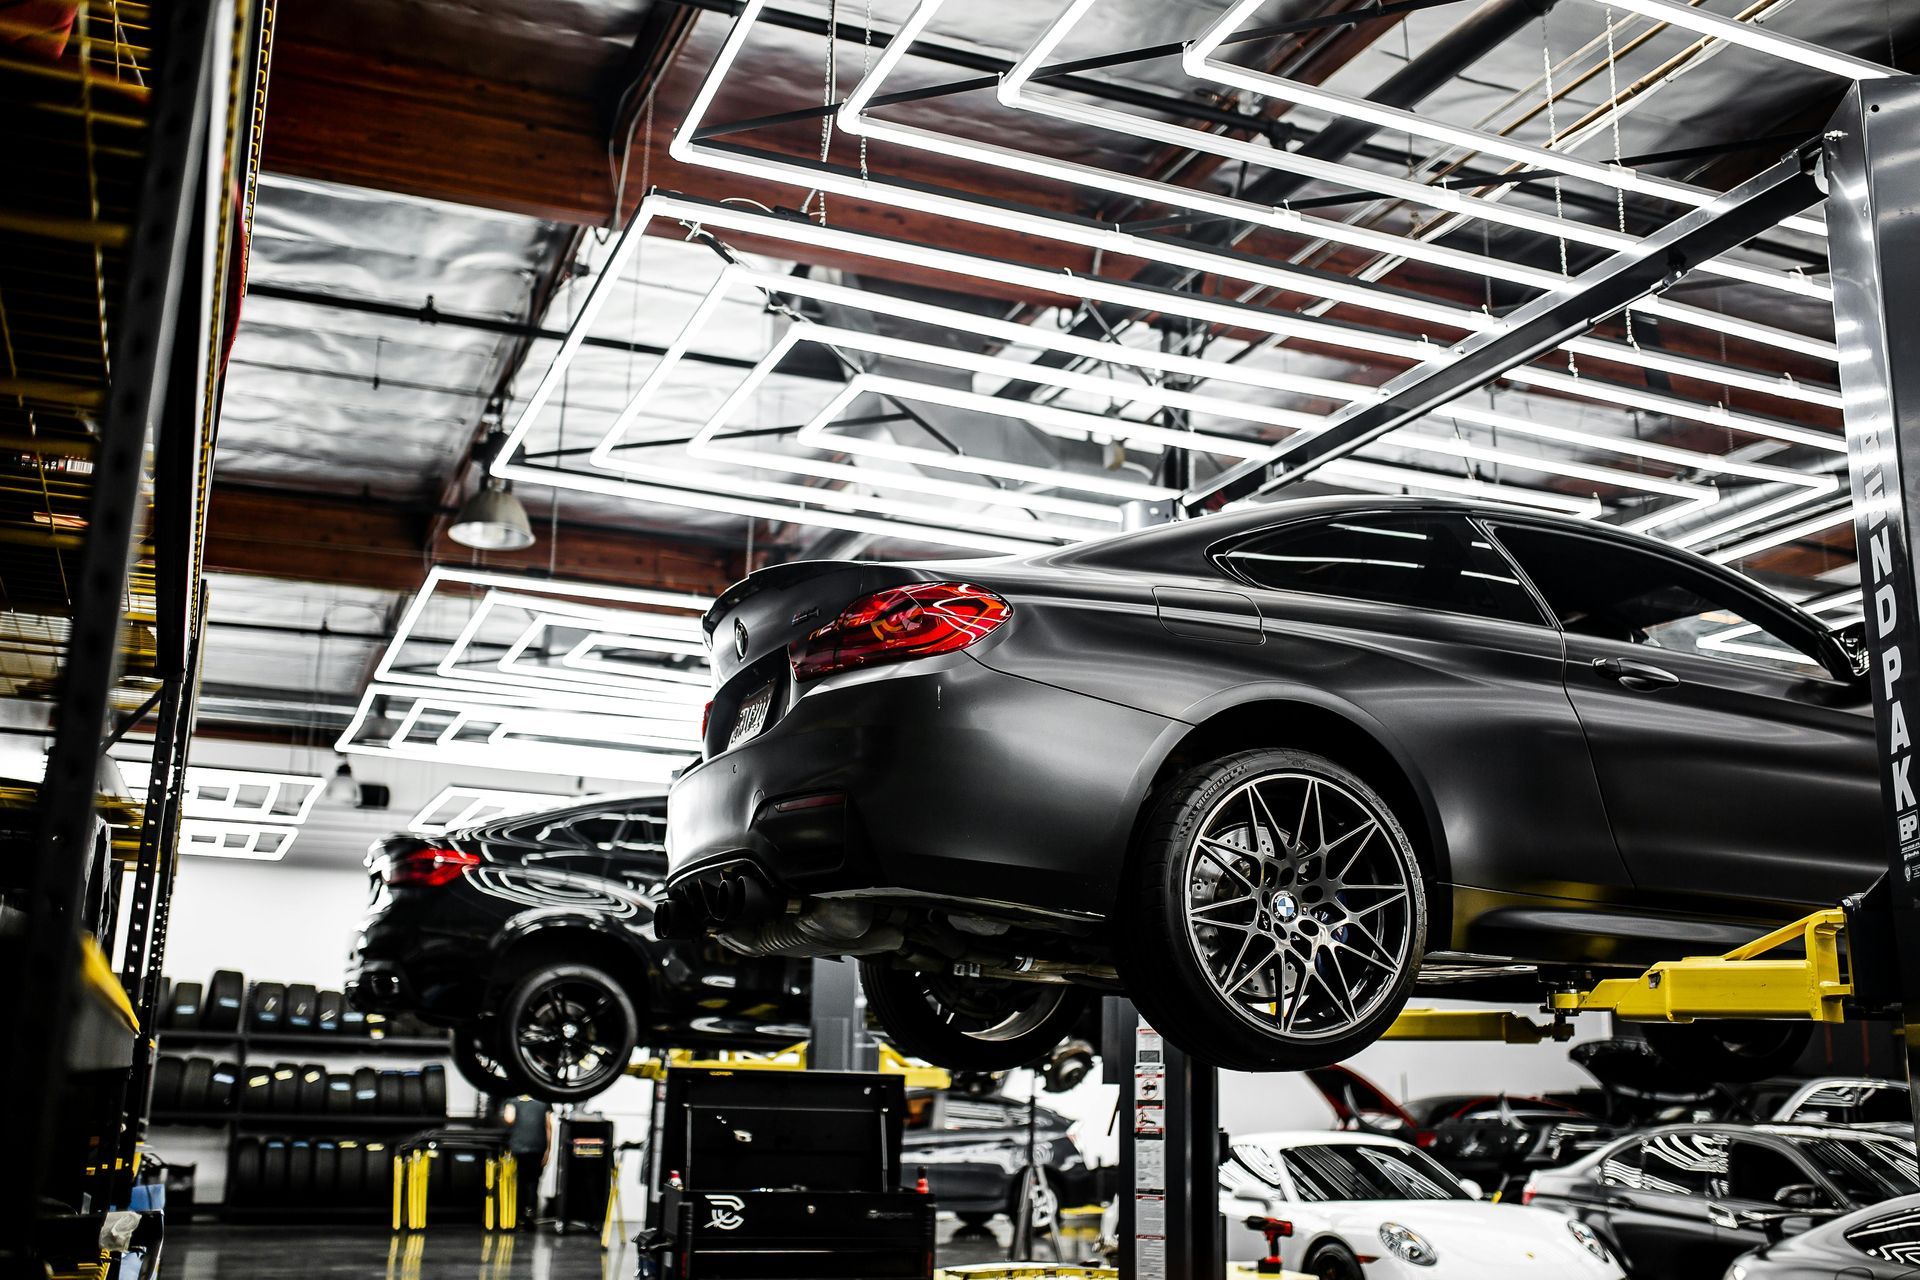
One of the most common things we hear at TMJ Bimmers is: "The car drives great." And often, that's absolutely true. The BMW starts every morning, accelerates smoothly, shifts properly, and doesn't display any warning lights. To the owner, everything appears normal. The problem is that many BMW issues develop long before they create noticeable symptoms. In fact, some of the most expensive repairs we see started as problems the driver couldn't feel, hear, or see. That's why one of the biggest mistakes BMW owners make is assuming that if the vehicle drives perfectly, it doesn't need service. Let's talk about why that assumption can be costly. Modern BMWs Are Designed to Hide Problems Today's BMWs are incredibly sophisticated machines. Advanced engine management systems, adaptive electronics, and intelligent monitoring systems allow the vehicle to compensate for developing problems in ways older vehicles never could. A BMW may continue to drive normally even when: An oil leak is developing A coolant leak has started Suspension components are wearing out Battery health is declining Engine mounts are deteriorating Fluid quality is degrading The vehicle often adapts and compensates until the problem reaches a point where it can no longer be ignored. Unfortunately, by that point, the repair is usually more expensive. Small Oil Leaks Rarely Affect Driveability One of the best examples is an oil leak. Many BMW owners assume they would notice an oil leak immediately because they expect to see oil spots on the driveway. That's not always the case. Modern BMWs use extensive underbody covers and splash shields that can trap leaking oil for months. The vehicle may drive perfectly while: Oil slowly accumulates underneath the engine Rubber components become contaminated Belts are exposed to leaking oil Gaskets continue to deteriorate Eventually, what could have been a relatively straightforward repair becomes a larger and more expensive one. Just because your BMW isn't leaving oil stains on the ground doesn't mean it isn't leaking. Cooling System Problems Often Begin Quietly BMW cooling systems are another example. Many BMW engines rely on electric water pumps, plastic fittings, expansion tanks, and hoses that naturally age over time. These components don't always fail without warning. Often there are subtle clues first: Small coolant seepage Dried coolant residue Minor pressure loss Aging plastic components The vehicle may still run at normal temperatures and drive perfectly. Then one day, a component fails completely. What started as a preventative repair can quickly become a roadside breakdown. Your Battery Can Be Weak Long Before It Dies Most people think batteries have only two states: Good Dead BMW batteries are more complicated than that. As battery performance declines, the vehicle may begin disabling certain functions to conserve power. You may notice: Auto start-stop stops working Comfort access becomes inconsistent Warning messages appear intermittently Electrical systems behave strangely Or you may notice nothing at all. A battery can be nearing the end of its life while the vehicle still starts normally every day. Battery testing is one of the simplest ways to identify a potential issue before it becomes an inconvenience. Fluid Condition Matters Even When Everything Feels Normal Many vehicle fluids don't suddenly become bad overnight. They slowly lose their effectiveness over time. Consider: Brake fluid absorbs moisture. Coolant loses corrosion protection. Transmission fluid breaks down from heat cycles. Differential fluid accumulates wear particles. None of these conditions necessarily change how the vehicle feels during your daily commute. But over thousands of miles, degraded fluids contribute to increased wear and reduced component life. This is one reason preventative maintenance remains so important. You're protecting components long before symptoms appear. Suspension Wear Is Often Gradual BMW owners become accustomed to how their vehicle drives. The change is so gradual that many drivers don't realize suspension components are wearing out. We frequently inspect vehicles that have: Worn control arm bushings Aging shocks Deteriorating strut mounts Excessive suspension play The owner often says: "I didn't notice anything wrong." That's because suspension wear typically develops over years, not days. A professional inspection can identify these issues before they affect tire wear, handling, or ride quality. Warning Lights Are Not the Beginning of a Problem Many owners view warning lights as the first sign of trouble. In reality, warning lights are often the result of a problem that has already existed for some time. For example: A coolant leak may exist before a low coolant warning appears. A battery may weaken before electrical warnings begin. An oil leak may develop before oil levels become low. Suspension wear may occur long before abnormal tire wear is visible. The warning light is often the vehicle's way of saying: "This issue has progressed far enough that I can no longer ignore it." That's why waiting for a dashboard warning isn't always the best maintenance strategy. The Goal Isn't to Repair Everything When we recommend inspections or preventative maintenance, the goal isn't to find things to sell. The goal is to understand the vehicle's condition. A good BMW specialist helps owners answer questions like: What needs attention now? What should be monitored? What can safely wait? What repairs will likely be needed in the future? That information allows owners to plan instead of react. And planned maintenance is almost always less stressful than unexpected repairs. The Most Expensive Repairs Often Start as Minor Issues The reality is that major BMW repairs rarely appear overnight. They usually begin as: Small leaks Aging components Minor wear Preventable maintenance items When caught early, many of these issues are manageable. When ignored, they can lead to significantly larger repair bills. That's why a BMW that drives perfectly may still benefit from a professional inspection and preventative maintenance plan. Don't Wait for Symptoms One of the best things about owning a BMW is how refined and capable these vehicles are. One of the challenges is that they often continue performing well even as problems begin developing beneath the surface. Waiting until a vehicle drives poorly, leaks heavily, overheats, or displays warning lights often means the issue has progressed further than necessary. At TMJ Bimmers, we believe the best BMW ownership experience comes from staying ahead of problems rather than reacting to them. If it's been a while since your BMW has had a comprehensive inspection, or if you've recently purchased a used BMW, a proactive vehicle health check can help identify potential issues before they become costly repairs. Because sometimes the BMW that drives perfectly today is the one that benefits most from preventative maintenance.

The body content of your post goes here. To edit this text, click on it and delete this default text and start typing your own or paste your own from a different source.
Expert air conditioning service for European vehicles in Houston, TX. Trust TMJ Bimmers Euro Auto Repair for reliable maintenance. Schedule an appointment!
A Smarter Way to Buy—and Own—a BMW There’s a moment that every BMW buyer knows well. You spot the car. The stance is right. The paint catches the light just enough. You take it for a drive, and within minutes, you’re already picturing it in your driveway. At that point, logic tends to take a backseat. That’s exactly where problems start. BMWs are engineered to deliver an incredible driving experience—but they’re also complex machines with very specific maintenance needs. A car can feel tight, smooth, and powerful during a 15-minute test drive while quietly hiding thousands of dollars in upcoming repairs. That’s why at TMJ Bimmers, we always say the same thing: The most important part of buying a BMW happens before you own it—and immediately after you do. The Emotional Trap of Buying a BMW Buying a car isn’t purely rational. If it were, no one would care about driving dynamics, exhaust notes, or design details. With these luxury vehicles, that emotional pull is even stronger. You’re not just buying transportation—you’re buying performance, precision, and a driving identity. But that emotional momentum can cause buyers to overlook one critical step: verifying what’s actually going on beneath the surface. A clean Carfax. No warning lights. A smooth drive. That’s not proof of a healthy vehicle. It’s just the absence of obvious problems. What a Pre-Purchase Inspection Really Does A Pre-Purchase Inspection (PPI) is where emotion meets reality in the best possible way. It doesn’t exist to kill a deal. It exists to define the deal. At TMJ Bimmers, a proper PPI is less like a checklist and more like a full diagnostic story of the vehicle. We’re not just looking for what’s broken—we’re identifying what’s about to be. Because with these vehicles, timing is everything. A car may not need a cooling system today—but if it’s original at 70–90k miles, it’s not a question of if, it’s when. Here’s what we’re really uncovering during a PPI: Hidden electronic issues Stored shadow codes that never trigger dashboard warnings. These can point to early-stage failures long before they become obvious. Oil leaks in their early stages A minor seep today becomes a major repair tomorrow. Catching it early changes both the cost and the conversation. Cooling system wear Water pumps and thermostats don’t always fail gradually. Sometimes they fail all at once, and when they do, the engine is at risk. Suspension fatigue The car may still feel fine, but worn bushings and dampers slowly degrade handling and tire wear. Signs of previous repair work Not all repairs are equal. We often find evidence of shortcuts that won’t hold up long term. This isn’t about finding a perfect car. That doesn’t exist. It’s about understanding what you’re walking into. The Power of Information and Negotiation One of the biggest misconceptions about a PPI is that it’s just a pass or fail test. It’s not. It’s leverage. When you know the car needs a valve cover gasket, suspension work, or a cooling system refresh, you’re no longer guessing. You’re negotiating with facts. We’ve seen buyers save thousands simply by having a clear, professional assessment in hand. In many cases, the cost of the inspection is covered several times over in the final purchase price. And just as important, we’ve seen buyers walk away from cars that would have become expensive mistakes. Both outcomes are wins. Already Bought the Car? You’re Not Too Late Sometimes deals move fast. Sometimes the right car shows up and you don’t want to lose it. Or maybe you didn’t realize how important a PPI was until after the purchase. That’s where a Post-Purchase Inspection becomes critical. Instead of evaluating whether you should buy the car, we shift to a more important question: What does this car need now, and what will it need next? Turning Ownership Into a Plan A Post-Purchase Inspection at TMJ Bimmers is about creating a roadmap. Not everything needs to be fixed immediately. The key is knowing what matters now versus later. We typically break things into three categories: Immediate Attention These are issues that shouldn’t wait: Active oil or coolant leaks Brake components below safe limits Overheating risks Safety-related suspension concerns Near-Term Maintenance These are the items that, if ignored, become bigger repairs: Tires nearing replacement Aging batteries Worn control arm bushings or mounts Long-Term Planning This is where smart BMW, Mercedes, and Porsche ownership really pays off: Cooling system refresh intervals Transmission service, which is often overlooked Engine-specific known issues based on platform This approach removes guesswork. Instead of reacting to problems, you’re managing them. Why BMW-Specific Experience Changes Everything BMWs aren’t like most cars, and that’s exactly why people love them. But it’s also why generic inspections fall short. A general shop might tell you a car looks good. A BMW specialist will tell you: If that engine is known for timing chain issues Whether those injectors are nearing failure If the cooling system is original and on borrowed time Whether a small leak is routine or a warning sign At TMJ Bimmers, we don’t just inspect cars—we see patterns. We know how these vehicles age, where they fail, and what separates a good buy from a costly one. That level of insight only comes from specialization. A Quick Story That Says It All A customer came in ready to buy a BMW that checked every box. Clean history, great condition, no warning lights. On the surface, it was exactly what you’d want. During the PPI, we found: An early-stage oil leak Front suspension wear that hadn’t yet affected the drive Cooling system components nearing the end of their lifecycle Nothing catastrophic, but all expensive if ignored. Armed with that information, the buyer renegotiated the deal and saved thousands. Same car. Completely different outcome. The Bottom Line Buying a BMW should be exciting. Owning one should be rewarding. Both are true when you go in with clear information. A Pre-Purchase Inspection protects you before the decision. A Post-Purchase Inspection protects you after it. Together, they remove uncertainty and replace it with control. And with a car like a BMW, that makes all the difference. Schedule with Confidence If you’re considering a BMW or you’ve just bought one, don’t rely on guesswork. Schedule your inspection with TMJ Bimmers and get a clear, honest understanding of your vehicle before small issues turn into major repairs.

DIY BMW Maintenance: How to Replace Your Cabin Air Filter BMW ownership is about more than performance and driving dynamics. Comfort, air quality, and interior climate control are just as important to the driving experience. One of the most overlooked maintenance items that directly affects all three is the cabin air filter. Replacing your BMW’s cabin air filter is one of the easiest DIY services owners can perform, yet it has a noticeable impact on air quality, HVAC performance, and even interior odors. In this guide, TMJ Bimmers explains how to replace your BMW cabin air filter properly and when it makes sense to handle the job yourself. What Does a Cabin Air Filter Do? The cabin air filter cleans the air entering your vehicle through the heating and air conditioning system. It traps: • Dust and pollen • Road debris and pollutants • Exhaust particles • Mold spores and allergens Every time you turn on your climate control system, air passes through this filter before reaching the cabin. Over time, the filter becomes clogged, restricting airflow and reducing system efficiency. Signs Your BMW Cabin Air Filter Needs Replacement Many drivers don’t realize their filter is overdue because performance declines gradually. Common symptoms include: • Weak airflow from vents • Musty or unpleasant odors • Increased dust inside the cabin • Windows fogging more easily • Louder HVAC fan noise BMW typically recommends replacement every 12–15 months, but urban driving or heavy traffic conditions may require more frequent service. Where the Cabin Air Filter Is Located Unlike many vehicles, most modern BMWs place the cabin air filter under the hood near the windshield cowl rather than behind the glove box. Exact placement varies slightly by model, but the process is very similar across the BMW lineup including 3 Series, 4 Series, 5 Series, X3, and X5 models. Tools You’ll Need Most BMW cabin air filter replacements require minimal tools: • Replacement cabin air filter (OEM or high-quality equivalent) • Torx driver or small socket set (varies by model) • Clean cloth or shop towel No lifting or specialty equipment is required. Step-by-Step: Replacing the Cabin Air Filter Step 1: Open the Hood Park on a flat surface, turn off the engine, and open the hood. Locate the plastic cowl panel at the base of the windshield on the passenger side. Step 2: Remove the Filter Housing Cover Release the clips or remove the screws securing the plastic cover. Carefully lift the housing cover to expose the cabin air filter tray. Step 3: Remove the Old Filter Slide the filter out slowly. Pay attention to the airflow direction arrows printed on the filter, as the new filter must be installed the same way. You may notice leaves, dirt, or debris inside the housing. This is normal. Step 4: Clean the Housing Area Use a clean cloth to remove loose debris from inside the filter compartment. Keeping this area clean improves airflow and prevents odors. Step 5: Install the New Filter Insert the new filter with airflow arrows pointing in the correct direction, usually toward the cabin. Ensure the filter sits evenly and fully inside the tray without bending. Step 6: Reinstall the Cover Reattach the housing cover and secure all clips or screws. Close the hood and start the vehicle to verify normal airflow. Choosing the Right Cabin Air Filter Not all filters are equal. BMWs benefit from higher-quality filters designed for advanced HVAC systems. Recommended options include: • OEM BMW filters • Activated charcoal filters for odor reduction • Anti-allergen or premium microfilters Activated carbon filters are especially helpful for drivers in city environments or heavy traffic. How Often Should You Replace It? TMJ Bimmers recommends cabin air filter replacement: • Every 12 months or 10,000–15,000 miles • Before allergy season • After heavy wildfire smoke or poor air quality conditions • Whenever airflow noticeably decreases Regular replacement helps your HVAC system operate efficiently and reduces strain on blower motor components. When DIY Isn’t the Best Option While cabin air filters are generally DIY-friendly, professional service may be better if: • Plastic cowl panels feel brittle or damaged • Fasteners are stripped or missing • You notice water intrusion near the filter housing • Persistent odors remain after replacement These can indicate drainage or sealing issues that require inspection. Why This Small Service Matters A clean cabin air filter improves more than comfort. It helps maintain proper HVAC airflow, reduces system wear, and improves overall driving experience. Many BMW owners are surprised how much quieter and stronger their climate system feels after replacement. DIY Maintenance With Professional Support At TMJ Bimmers, we encourage BMW owners to understand their vehicles and handle simple maintenance when they feel comfortable doing so. Preventative care like cabin air filter replacement helps extend vehicle life and keeps small issues from becoming large repairs. When you prefer expert service, our BMW-specialized technicians inspect the entire HVAC and ventilation system during maintenance visits to ensure everything operates exactly as engineered. Need BMW Maintenance or Inspection? TMJ Bimmers provides BMW-focused service designed for long-term reliability and performance, including: • Scheduled maintenance services • HVAC system inspections • Interior air quality solutions • Preventative maintenance planning • BMW factory-level diagnostics Whether you enjoy DIY maintenance or want professional support, TMJ Bimmers is here to help keep your BMW performing at its best.
Expert battery servicing at TMJ Bimmers Euro Auto Repair in Houston, TX. Ensure your vehicle runs smoothly. Call us today for a check-up!
Enhance vehicle safety with precise alignments at TMJ Bimmers Euro Auto Repair in Houston, TX. Expert care for optimal performance. Schedule an appointment now!
Discover top-tier Noelle Performance Tuning at TMJ Bimmers Euro Auto Repair in Houston, TX. Enhance your vehicle's performance. Schedule an online appointment now!
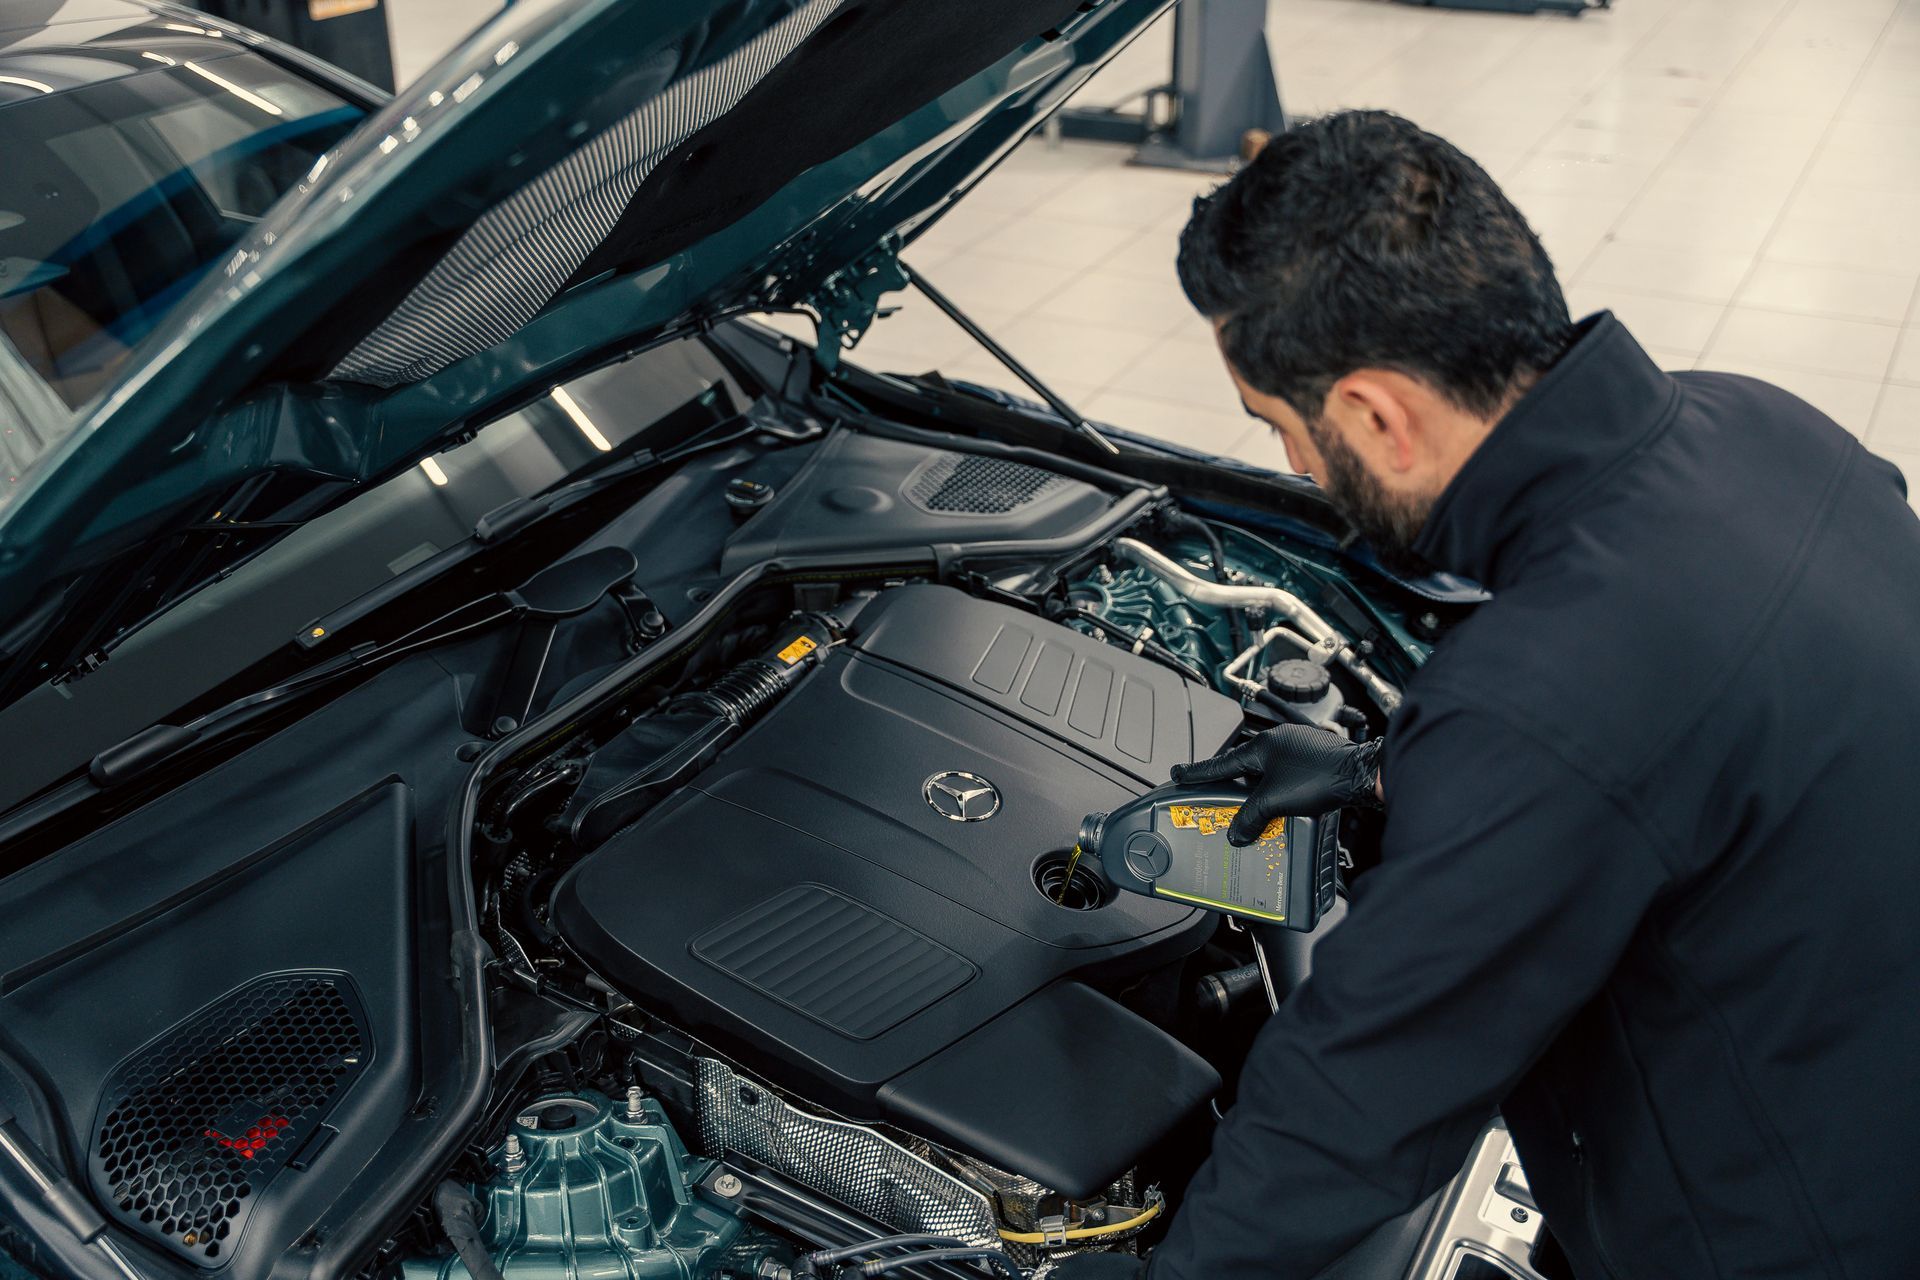
BMW ownership is about performance, precision engineering, and driving enjoyment. Keeping your BMW running the way it was designed doesn’t always require a full service appointment. Often, it’s the small maintenance habits that make the biggest difference. One of the easiest ways to protect your engine and avoid costly repairs is learning how to properly check and top off your vehicle’s essential fluids. In this guide, TMJ Bimmers walks you through how to safely top off: • Engine oil • Engine coolant • Windshield washer fluid These are simple DIY tasks most BMW owners can handle, as long as they’re done correctly. Why Fluid Levels Matter More on BMWs BMW engines operate at tighter tolerances and higher temperatures than many other vehicles. Modern BMWs rely heavily on precise cooling efficiency, electronic monitoring, and proper lubrication to maintain performance and reliability. Running low on fluids can lead to overheating, premature engine wear, warning lights, reduced efficiency, and expensive repairs that could have been prevented with routine checks. A quick monthly inspection is often all it takes to stay ahead of problems. Topping Off Engine Coolant Why Coolant Is Critical BMW engines run hotter by design to improve efficiency and emissions performance. The cooling system must operate perfectly to regulate temperature. Low coolant levels can quickly cause overheating, one of the fastest ways to damage a BMW engine. Before You Start (!) Only check coolant when the engine is completely cold. Opening the coolant reservoir while hot can release pressurized steam and cause serious burns. Step-by-Step Open the hood. Locate the coolant expansion tank, typically a translucent reservoir with a warning symbol. Check the float indicator or level markings. If low, slowly remove the cap. Add BMW-approved coolant mixed 50/50 with distilled water. Fill only to the MAX indicator and avoid overfilling. Secure the cap tightly. TMJ Bimmers Pro Tips BMW cooling systems are sensitive. If you need to add coolant more than once or twice per year, there is likely a leak that should be professionally inspected. Also, remember to ONLY use distilled water to mix with BMW-approved coolant. Tap water contains minerals that can cause engine corrosion, promote sludge buildup, and damage the cooling system over time. Distilled water ensures the mixture remains pure, preventing these issues. Checking and Topping Off Engine Oil BMW Oil Systems Are Different Many modern BMW models no longer include a physical dipstick. Oil level is measured electronically through the vehicle’s onboard system. How to Check Oil Level Park on level ground. Bring the engine to operating temperature. Navigate through iDrive to Vehicle Status and select Engine Oil Level. Run the measurement process. If Oil Is Low Locate the oil filler cap on top of the engine. Remove the cap carefully. Add BMW-approved synthetic oil slowly. Add small amounts, about half a quart at a time. Recheck the level electronically. Overfilling oil can be just as harmful as running low, so add gradually. TMJ Bimmers Recommendation for BMW-Specific Oil BMW periodically updates its engine oil approval standards to match evolving engine designs, emissions requirements, fuel quality, service intervals, and operating conditions. These specifications are identified by BMW “Approval” codes that generally correspond with newer generations of BMW engines. BMW Approval standards are different from oil viscosity. Multiple viscosity grades may meet the same BMW approval. The approval code simply confirms that the oil meets BMW’s required performance specifications for the engine it is used in. To determine the correct oil specification for your specific BMW, refer to your owner’s manual or BMW’s official Owner’s Guide at https://www.bmwusa.com/owners-manuals.html . We always recommend using engine oil that meets the correct BMW Approval specification for your vehicle. Topping Off Windshield Washer Fluid Why It Matters Washer fluid may seem minor, but it plays an important safety role, especially during winter driving, highway travel, and dirty road conditions. Many BMW models also use washer fluid for headlight cleaning systems. Steps Locate the washer fluid reservoir with the blue cap showing a windshield symbol. Open the cap. Pour washer fluid directly into the reservoir. Fill until nearly full. Use the Right Fluid Avoid using plain water. Proper washer fluid prevents freezing, removes grime effectively, and protects the washer pump and system components. How Often Should You Check Fluids? TMJ Bimmers recommends checking fluid levels: • Once per month • Before long road trips • When dashboard warnings appear • During seasonal changes, especially winter The entire process takes less than five minutes and can prevent major repairs. Warning Signs You Should Not DIY Topping off fluids is maintenance, not repair. Schedule professional service if you notice frequent coolant warnings, rapid oil loss, fluid smells from the engine bay, visible leaks, overheating alerts, or white smoke from the exhaust. These symptoms usually indicate an underlying issue requiring proper diagnosis. DIY When You Want, Expert Help When You Need It At TMJ Bimmers, we believe educated BMW owners make better maintenance decisions. Learning basic upkeep like fluid checks helps you understand your vehicle and avoid preventable damage. When something doesn’t seem right, or if you simply prefer professional service, our BMW-focused technicians provide dealership-level expertise without dealership pricing. We use factory-approved fluids and procedures designed specifically for BMW vehicles. Need Help With BMW Maintenance? Whether you maintain your BMW yourself or prefer expert service, TMJ Bimmers is your trusted resource for oil services, cooling system inspections, leak diagnosis, preventative maintenance, and long-term reliability care. Contact TMJ Bimmers today to keep your BMW running exactly as it was engineered to perform.